Textured ceilings—like popcorn, knockdown, or swirl—can hide imperfections and add character. But when it’s time for a refresh, painting them takes a bit more care than a smooth surface. Don’t worry—it’s still a manageable DIY project if you prep properly and use the right tools.
What You’ll Need:
- Ceiling paint (flat or matte finish recommended)
- Thick-nap roller (3/4″ or more)
- Extension pole
- Angled brush
- Drop cloths or plastic sheeting
- Painter’s tape
- Ladder or step stool
- Spray bottle (optional for patch testing)
Step 1:
Check If It’s Paintable
If you have a popcorn ceiling and your house was built before the 1990s, you’ll want to ensure it doesn’t contain asbestos. Don’t attempt to sand or scrape without testing first.
If the texture has never been painted before, do a patch test with water in a spray bottle. If it absorbs and softens, use an oil-based primer.
Step 2:
Protect the Room
Cover all furniture and floors with drop cloths. Textured ceilings are prone to shedding a bit during painting. Use painter’s tape along the wall line and around light fixtures or vents.
Step 3:
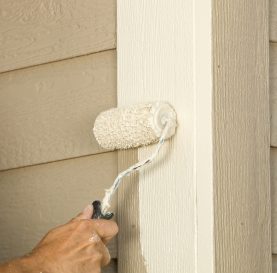
Choose the Right Roller
Use a thick, high-capacity roller cover—typically 3/4″ to 1-1/4″ nap—to get into the grooves and crevices of the texture. A roller with too short a nap will skim the surface and miss the deeper cavities of the texture.
Step 4:
Cut In Around the Edges
Use a good, angled sash brush to cut in along the walls and around fixtures. Work slowly to avoid pulling off texture, especially if it’s unsealed or flaky.
Step 5:
Roll the Ceiling Gently
Load the roller with paint, then roll it out in your tray to remove excess. Start rolling in slow, straight lines. Don’t press too hard—let the roller do the work.
Work in small sections and overlap slightly to maintain a consistent texture and avoid roller lines.
Pro Tip: Roll in one direction across the entire ceiling rather than a criss-cross pattern. This helps maintain uniform texture appearance when dry.
Step 6:
Let It Dry and Decide on a Second Coat
Let the first coat dry fully. If the old colour is still showing or coverage is uneven, apply a second coat using the same method. Painting a textured ceiling isn’t as fussy as you might think—it just takes patience, the right roller, and a gentle touch.
Ask Us About the Right Roller
Autohome has the thick-nap rollers, flat ceiling paints, and prep tools you need to get the job done right. Not sure what texture you’re working with? Snap a photo and bring it in—we’ll help you figure it out.
Need help choosing a paint colour?
Our complimentary in-home consultations will help you choose a colour that brings your vision to life!