A slow drip or hairline crack in your boat might seem minor—but left unchecked, it can lead to costly damage. Marine-grade epoxy is one of the fastest and most reliable ways to seal leaks, whether you’re fixing a fibreglass hull, a leaking fitting, or a cracked seam.
Here’s how to use it properly for a watertight, long-lasting repair.
What You’ll Need:
- Two-part marine epoxy or epoxy putty
- Sandpaper (80–120 grit)
- Acetone or surface cleaner
- Disposable gloves and mask
- Mixing container and stir stick (or kneadable putty)
- Applicator or plastic spreader
- Fibreglass patch (optional for reinforcement)
Step 1:
Locate and Inspect the Leak
Leaks often show up around fittings, seams, or impact zones. Dry the area completely and inspect closely—on fibreglass, look for hairline cracks or gelcoat blisters. For wood or aluminum, check for seams or joint separation.
If water is seeping through from inside, mark the location before draining the hull.
Step 2:
Dry and Clean the Area
The repair surface must be clean, dry, and free of wax, dirt, or grease. Scrub with acetone or a marine degreaser, then let it dry thoroughly. Sand the area to rough up the surface and improve adhesion. Tack with a tack cloth.
If working in damp conditions or dealing with wet wood, choose an epoxy designed to cure in moisture or underwater.
Step 3:
Mix and Apply the Epoxy
Mix the epoxy resin and hardener thoroughly (or knead epoxy putty, if using a pre-measured stick). Work quickly—the pot life may only be 5–15 minutes depending on the product and temperature.
- For cracks or seams, press the epoxy into the gap using a spreader or gloved fingers.
- For surface leaks or voids, apply a smooth layer over the area.
- For larger repairs, apply a fibreglass patch over wet epoxy, then add more epoxy on top to seal it in.
Step 4:
Let It Cure
Leave the epoxy undisturbed for the full cure time listed on the label—typically 4 to 24 hours. Avoid moving or stressing the area until fully hardened.
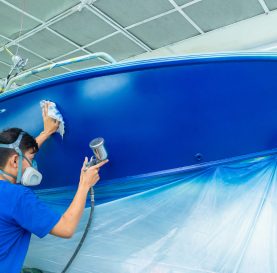
Once cured, you can sand and paint over the repair if needed.
Quick Tips:
- Use slow-cure epoxy in warmer weather for more working time.
- If you’re sealing around a fitting or screw, epoxy can be used as a base before re-bedding with sealant.
Stay Dry, Stay Safe
Small leaks often lead to big problems if left alone. Sealing them with marine epoxy is a quick fix that can save you serious time and money—especially if you catch them early.
Autohome Has You Covered
From moisture-tolerant epoxies to fast-curing putties and patch kits, Autohome stocks trusted marine repair products that work. Stop in, show us a photo or describe the problem—we’ll help you choose the best product for your boat and water conditions.
Need Some Help With Your Project?
Have questions or looking for some advice? Our team is ready to help answer your questions today.